Showing posts with label Tutorials. Show all posts

Sunday, December 4, 2011

Wax Paper Garland Tutorial


I made a  faux capriz shell garland out of wax paper  for our Christmas tree.  I promised a tutorial and here it is!  This is one of my favorite DIY projects to date, and I hope you enjoy the tutorial!  if you have any questions just let me know!

Materials needed:

  • Wax Paper
  • Iron
  • Towel
  • Large circle paper punch (mine is 1.5 inches)
  • Scissors
  • Sewing machine and thread

(thanks to my sweet husband for taking these photos and video for me…they were taken on his iphone, so the quality isn’t very great.  But you’ll get the idea)

Step #1

Find a hard surface you can iron on and place a thin towel on top of the surface.  (I used our kitchen counter)

Step #2

Tear off 3 sheets of wax paper (as long as you want, but I just did about 2 foot sections at a time). 

waxpaper1

Step #3

Line the sheets up evenly and place on towel. Begin lightly ironing over the three sheets.  They will begin to fuse together. 

wax paper2

It will look like this one ironed

waxpaper12

Step #5

Trim the ends so that they are even.

waxpaper4

Step #6

Begin to fold the wax paper back and forth in an accordion style fold.  (Making sure that the folded surface is large enough for your circle punch)

waxpaper5

waxpaper6

Step #7

Taking half of the accordion fold at a time, begin to punch out your circles.

waxpaper8

waxpaper9

Step #8

Once all of your circles are punched, look through to see if any need to be trimmed

waxpaper10

Step #9

Begin sewing your garland together on your sewing machine.  It is easier to just show you than explain it, so we did a short video clip to help you understand.


Once you’ve sewn all your circles, you can make more cirlces to make longer garland strands or cut and make several smaller.  I opted for several smaller because I am too impatient and wanted to see what they looked like on the tree!

waxpapergarlandchristmastree

I was inspired by these this tutorial for a garland and this tutorial for a chandelier

Saturday, March 12, 2011

DIY Wedding Map

wedding map with insert
I created my own map to use on our ceremony programs to help our guests get from the ceremony site to the reception sit. 

I couldn’t believe how easy it was, although it did take me a couple of hours to put it all together.  Click here for a full tutorial on how to create your own diy map.   I used th "Hand Traced with Zoom" Tutorial.  This could be used for parties or special events, not just weddings.

I created mine in powerpoint instead of Word, because I know how to save a powerpoint slide as a jpeg file.  If you don’t need the image as a jpeg, go ahead and make it in Word.  Otherwise, open a new powerpoint slide, create your map using the directions on Weddingmapper’s website, and then click “save as”.  Choose “Other formats”, and then in the pop up window, under the file name, choose “JPEG File Interchangeable Format” as the “Save as type”.  You can now insert the full map into any document or anywhere you could use any normal picture file. 

Monday, March 7, 2011

Personalized Wedding Hangers

Somewhere along the line of collecting wedding inspiration pictures, I came across some pictures of personalized hangers for your wedding dress.  You can buy them online on etsy, but I decided to try my hand at making some personalized hangers for myself and for my bridesmaids.  Here is what I came up with… 
 100_0981
These are actually really simple and easy to make.  Just pick up a pack of wooden hangers at the store (I bought the shirt hangers from Wal-Mart for about $4.50/pack of 5).  If you are using them for dresses, make sure you buy the kind with the indentions for the strings that hold up the dresses.  You’d hate to make these and then not the dresses slip right off of them! 
Supplies Needed:
  • Wooden Hanger(s)
  • Paint
  • Pencil
  • Pen
  • Computer and Printer
  • Tape
Step #1:
Print off your monogram, name, or whatever you want to put on your hanger from your computer.  I typed up all of my bridesmaids names and my new monogram on Word using the font Lauren Script and just printed on regular computer paper. 
Cut out the names, etc. 
100_0989

Step #2
Turn the cut out name over and using a pencil, shade in the back.  (Making sure that you cover the entire section where the name is on the opposite side. 
100_0993
Step #3:
Turn the paper back over and tape to the hanger. 
 
100_0994

Step #4
Trace over the name with a ball point pen, pressing down hard.  You could just trace the outline or you could go over the entire letter.  Since my letters were fairly fat, I just traced the outline. 

100_0995
Step #5:
Take the paper off the hanger.  You will know have an imprinted outline of the name from the lead rubbing off from the pencil marking on the back of the paper.  (Sorry I didn’t take pictures using the same hanger, but you still get the idea)
 
100_0987

Step #6:
Fill in the outline using a thin tip paint brush and paint.  You could probably also do this with a permanent marker. 
100_0988

By no means did they turn out perfect, but they still look wonderful in my opinion! 
100_0975
I plan to use my hanger for taking photos of my wedding dress hanging up.  You know those pretty pictures of wedding dresses hanging up, like this one..

and this one…
Bride's wedding dress hanging in Fountain Street Church
Can’t wait to have my own pictures of my wedding dress and of my bridesmaids dresses hanging out our new hangers!  Hope you enjoyed!
I found this tutorial for making the hangers on WeddingBee. 

Linked up to Frugal Friday at
 The Shabby Nest

Friday, February 11, 2011

Monogram Coffee Filter Wreath

100_0929
Coffee filter wreaths have been all the rage the last year or so, but I have yet to make one of these beauties for myself. I bought the coffee filters with the intent to do a regular wreath, but then had the idea to do a monogram hanger for the wedding.  I had already planned to make a monogram hanging with moss or something on it, so this would save me some money!  I think I spent around $5 total for everything including the coffee filters and some gluesticks. 
Here is how to make your own:
Materials:
  • Cardboard
  • Box Cutter/Exacto knife
  • Marker/Pen
  • Glue gun
  • Glue Sticks (you’ll use a lot of these)
  • Coffee Filters (I used right at 150)
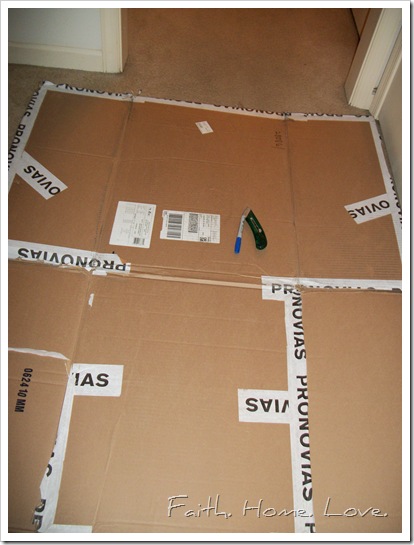
Step #1: Draw your monogram letter onto a piece of cardboard.  My monogram is about 18 inches tall, but you can adjust to whatever size you need.  I just freehanded the “J”, but you could always print one off the computer, cut it out, and then trace it. Step #2: Cut out letter with a box cutter or exacto knife  100_0913 Step #4 Once you have your letter cut out, you may need to do some trimming with scissors.  Then get all of your additional supplies together to begin gluing the coffee filters onto the board.

100_0911

100_0918 Step #5: I began by lining the edges with folded coffee filters. 100_0919 Fold the coffee filter in half, half it again, and then half it again.  Snip off the end to help the glue get into all the layers 100_0923 100_0920 Step #6: Begin filling in the middle section.   100_0921 I used a combination of filters folded in half twice and filters folded in half 3 times like the outline ones.   I didn’t snip off the ends of most of the ones in the middle so as to try to cover more of the cardboard. Just fill in as needed, and work your way all the way around the letter.  You don’t need to be exact, it is a very forgiving project.  If you mess us, just tear off the filter.  100_0925 Step #7: Look at your completed letter and see if you see any holes that need to be filled.  I had a few spots on the top that I added a few more filters to.  You may also want to trim the filters if there are areas that are uneven.  Just cut off the tops of the filters to the desired height.  100_0927
Enjoy your beautiful, frugal wreath door hanger!  I am going to be using ours at our wedding reception, and then later can use it in our home.

You can hang it if you add a ribbon on the back or just sit up somewhere :)
  100_0931

Click here for more wedding related posts!

I'm linking up to A Little Tipsy  DIY Under $5

and 

Friday, December 31, 2010

Fabric Flower Tutorial

I showed you the fabric flowers I made for Christmas in yesterday's post.  Today, I'll show you how to make one for yourself. 

Here is what you will need:


Materials
Glue gun and glue
Fabric
Scissors
Marker or pen
A flower template (just draw a flower shape and cut it out of paper)


Step #1: 
Trace the flower template onto your fabric. You will need 5-6 flower shapes per flower that you want to make.

Step #2:
Cut out the flower shapes
Step #3:
Cut out a circle from you fabric a little larger than a quarter. 


Step #4:
Fold your flower shape in half


Step #5:
Fold the flower shape in half again


Step #6:
Snip off the end

This is how it will look.  Add glue to the tip.
Step #7:
Glue the shape to your circle. 

Step #8:
Glue at least 3 more flower shapes onto your circle.  You may need more if you have a bigger circle.


Step #9:
Glue the last two petals onto the center of the flower. 


You can add a pin, hair bow, head band, magnet, etc. to the back. 

These make great small gifts and gift wrapping embellishments!


Related Posts Plugin for WordPress, Blogger...