Showing posts with label Recipes. Show all posts

Thursday, May 3, 2012

Weight Watchers Pumpkin Spice Muffins

Today I have the easiest recipe to share with you.  It only contains 2 ingredients....


A can of pumpkin puree, and a box of spice cake mix.  That's it!

Mix together until smooth and bake according to the box directions. (I did cook my muffins about 10 min. longer than the box said)  The mix will be thick and you'll need to spoon into the muffin tin.

They are super easy and super yummy!

A co-worker gave me this recipe and said that it could also be done with devil's food cake mix or vanilla cake mix.  You can add chocolate chips, raisins, or any little extras.

I haven't figured out the nutritional info yet, but it is a weight watchers recipe, so it can't be that bad, right?  :)


If you'd like a homemade pumpkin spice muffin check out this recipe... but I'm gonna bet it's a little less healthy.

Wednesday, October 26, 2011

Pinterest Project Week- Recipes Worth a Try

This week is all about actually completing some projects I’ve pinned on Pinterest.  I’ve dubbed it “Pinterest Project Week”.  Don’t forget, I’m hosting my first linky party on Friday for any Pinterest inspiration projects you want to share! 

One of my boards on Pinterest is called “Recipes Worth a Try”.  I have tried two new recipes from this board and they both were delicious! 

Recipe #1 is Smoky Corn and Black Bean Pizza

Here is the picture I repinned:

Smoky Corn & Black Bean Pizza Recipe

and here is our version…

100_2087

We used chedder cheese instead of mozzarella and we probably used a little more than the recipe called for, but I love cheese!

The original recipe is for a grilled pizza and doesn’t call for any onions, but we just baked our regular pizza crust in the oven and added our own toppings- diced plum tomatoes, diced onion, a can of black beans, and a can of corn (only used half a can of corn).  The pizza sauce is actually BBQ sauce and that gives it the smoky flavor.  You can find the original recipe here.  This will probably become a regular meal in our house, we really enjoyed it!  Here is a link to the original recipe

Recipe #2 was Fluffy Pancakes

Pinned Image

I didn’t get any pictures of our pancakes, because we ate them so fast!  They were some of the best pancakes I’ve ever had and I plan to use this recipe as my regular pancake recipe.  They have so much more flavor than pancake mix and really were fluffy!  At first I thought the mix was too thick, but it turned out to be just right. 

I highly suggest you try this recipe the next time you make pancakes!

Here is the original recipe:

Ingredients
  • 3/4 cup milk
  • 2 tablespoons white vinegar
  • 1 cup all-purpose flour
  • 2 tablespoons white sugar
  • 1 teaspoon baking powder
  • 1/2 teaspoon baking soda
  • 1/2 teaspoon salt
  • 1 egg
  • 2 tablespoons butter, melted
  • cooking spray
Directions
  1. Combine milk with vinegar in a medium bowl and set aside for 5 minutes to "sour".
  2. Combine flour, sugar, baking powder, baking soda, and salt in a large mixing bowl. Whisk egg and butter into "soured" milk. Pour the flour mixture into the wet ingredients and whisk until lumps are gone.
  3. Heat a large skillet over medium heat, and coat with cooking spray. Pour 1/4 cupfuls of batter onto the skillet, and cook until bubbles appear on the surface. Flip with a spatula, and cook until browned on the other side.

You can find the recipe here as well.

Saturday, August 13, 2011

My First Apple Pie


applepie3

Yesterday I made my first apple pie with the leftover apples from canning apple pie filling.  I didn't use one of the cans I made, but just whipped up a batch of apple pie goodness to use.  I'll admit, I didn't make my own pie crust- it was just a Wal-Mart brand pie crust from the fridge section but it was yummy non the less.  (Although I plan to make my own homemade pie crust next time- anyone have any good recipes to share?)

It isn't the prettiest thing in the world, and I totally forgot to actually make the lattice crust on top actually weave through each other (I just laid them all one direction and then laid another layer the opposite direction), but overall I was very pleased with the taste.

applepie2

 
Here is the recipe that I used:
Ingredients
  • 1 recipe pastry for a 9 inch double crust pie (or just a Wal-Mart crust)
  • 1/2 cup unsalted butter  (I only had salted so that is what I used
  • 3 tablespoons all-purpose flour (again, I modified because I only had self rising flour so I used that)
  • 1/4 cup water
  • 1/2 cup white sugar
  • 1/2 cup packed brown sugar
  • Sprinkle of cinnamon
  • 8 Granny Smith apples - peeled, cored and sliced (I have no idea what kind of apples I used, they are homegrown smaller apples that are tart.)
Directions
  1. Preheat oven to 350 degrees.  Melt the butter in a saucepan. Stir in flour to form a paste. Add water, white sugar and brown sugar, and sprinkle in a little cinnamon (about two or three shakes) and bring to a boil. Reduce temperature and let simmer.
  2. Place the bottom crust in your pan. Fill with apples, mounded slightly. Cover with a lattice work crust. Gently pour the sugar and butter liquid over the crust. Pour slowly so that it does not run off.
  3. Bake for 45min to 1 hour at 350 degrees, or until apples are soft.

I slightly modified this recipe from AllRecipes.com.  It has a 5 star rating from 3,834 people so I think it’s safe to say it is good!

Tuesday, August 9, 2011

Canned Apple Pie Filling

applepiefilling

I have been wanting to try my hand at home canning for a while now.  It seemed like such a daunting task, but I knew that it would be well worth it to have home fresh food canned to use all year round.  Because we have been on the go pretty much all summer, I’ve not had much of a chance to can any vegetables like I had hoped, but I did can some apple pie filling last week!  Jeremy loves pies and now I’ll be able to easily whip up some apple pies for him throughout the year. 

My uncle and aunt have a huge apple tree at their house and once we got back from Chicago the apples were ripe for picking!  We headed over and filled up two buckets of apples.

applepicking1


applepicking


We brought them home and washed them and waited until the next day to start canning.

apples1

My mom canned pickles and tomatoes several years ago and thankfully still had her canning supplies.  Supplies needed to can included a large pot to use as a water bath, mason jars, lids and rings, funnel, and tongs to get the jars out of the pot. 

I modified this recipe a little to use for canning my apple pie filling. 

Ingredients:
  • 4 1/2 cups white sugar
  • 1 cup cornstarch
  • 4 teaspoons ground cinnamon
  • 1/4 teaspoon ground nutmeg
  • 2 teaspoons salt
  • 10 cups water
  • 3 tablespoons lemon juice
  • 6 pounds apples (I weighed my apples before peeling and that was a mistake.  I should have used more apples, so be sure to weigh after you peel because they will weigh less!)
Directions:
I first washed all of my jars and rings in the dishwasher because they had been sitting in the basement for several years. 
  1. In a large pot, mix sugar, cornstarch, cinnamon and nutmeg. Add salt and water and mix well. Bring to a boil and cook until thick and bubbly. Remove from heat and add lemon juice.
  2. Sterilize canning jars, lids and rings by boiling them in a large pot of water.
  3. Peel, core, and slice apples. Pack the sliced apples into hot canning jars, leaving a 1/2 inch headspace.
  4. Fill jars with hot syrup, and gently remove air bubbles with a plastic knife. (be sure to use plastic or silicone spatula to do this.  A regular knife can cause the hot jars to bust)
  5. Put lids on and process in a water bath canner for 20 minutes. (be sure to put the lid on the pot while the jars are in the water bath)
I didn’t take any pictures of the canning process because 1) I had no idea what I was doing, and 2) I was too scared I was going to mess something up to stop and take pictures :)

I was only able to get 6 jars out of the recipe, but I don’t think that I filled them enough with apples.  I had an extra jar of apples and I ran out of syrup for them.  I will try and fill the jars up with more apples next time and let them sit in the syrup for a few minutes to settle and rise.  The apples rose in the water bath and I can tell my jars have a lot of extra syrup in them at the bottom.

applepiefilling


All six cans sealed and I’ve got enough to make six small pies or three 9 inch pies.  I really enjoyed my first canning experience and can’t wait to can more next year!

Monday, July 11, 2011

Roasted Spaghetti Squash Seeds

 Next time you make spaghetti squash, take a few extra minutes to roast the seeds.  They taste almost identical to pumpkin seeds!  I love pumpkin seeds, but I only get them once a year when we carve pumpkins.  However, we eat spaghetti squash on a fairly regular basis so we get this fun snack more often. 
It is a great extra little healthy snack that you would otherwise just throw away!

Treat them exactly like you would pumpkin seeds and roast them in the oven.  I usually just sprinkle the seeds with olive oil and salt and stick in the oven o 350 degrees for about 25-30 minutes.  I flip them half way through.  Just roast until they begin to brown. 

Enjoy!

Monday, July 4, 2011

Homemade Frosty Recipe


Do you love Wendy's Frostys?  My family sure does!  We have this amazing recipe for homemade frostys, by far the best homemade ice cream I've ever had!  It is super simple and taste almost identical to Wendy's frostys. 

Ingredients:
- 1 large tub of cool whip
- 1/2 gallon of chocolate milk
- 1  can (14 oz) sweetened condensed milk
- 4 big squirts of chocolate syrup

(You can also use the low fat/fat free versions of each ingredient and it still tastes great- we made it with all fat free stuff today)

Directions:
Mix all ingredients together in a large bowl until well blended
Pour mixture into ice cream maker
Run ice cream maker about 25-30 minutes (or until it stops, the frostys do not get as thick as regular ice cream so your ice cream maker may not stop like it would with normal ice cream)

Enjoy!

This is perfect for hot summer days, plus how much fun is it to make homemade ice cream? 


Saturday, April 9, 2011

Salsa

I made this salsa last night for me, Jeremy, and our friend Seth.  Jeremy and Seth loved it and said it tasted like Moe’s salsa- which is a high compliment!  My friend Chrissey gave me this recipe last summer and it is so simple and easy. 

Ingredients:

1 can of diced tomatoes with zesty jalapenos

1/4 of an onion- diced

1 glove of garlic diced

2-3 Pinches of fresh cilantro, diced  (can’t go without it- its what makes the salsa!)

1 Jalapeno diced (optional)

Directions:

Place onion, garlic, jalapeno (optional) and cilantro in food processor.  Pulse a couple of times until finely chopped. 

Drain can of tomatoes and place in food processor.  Pulse until well mixed and to desired consistency.

It taste best to refrigerate about an hour before eating, but can be served immediately. 

Wednesday, April 6, 2011

Our Favorite Meal- Feta Burgers

Jeremy and I have a favorite meal to cook together- Feta Cheese Burgers!  My mom started making these when I was in high school and they are so good!  I made them for Jeremy once and now they have become our favorite meal to make together.  We’ve ventured to making our own buns from French bread for these too- it makes them even better!  But, if you don’t have the French Bread they are good just plain too.  It’s always a special treat when we get to have them!  We made them last night and thought I’d share this simple recipe.  I didn’t get a picture- we were too busy enjoying!  But trust me- they are great!

Ingredients:

  • Hamburger Meat
  • Petite Diced Tomatoes
  • Feta Cheese (Crumbled)
  • Fresh chopped spinach  (You can make them without spinach too)
  • Loaf of French Bread
  • Butter or Olive Oil
  • Garlic powder

Directions:

In a large mixing bowl, combine hamburger meat, diced tomatoes, spinach, and feta cheese and a sprinkle or two of garlic powder. Shape into patties.  (Jeremy likes to mix everything but the feta together then stuff the inside of each burger with the feta, you can do it either way)

Fry hamburgers in a large pan or grill until done(caution: they don’t stick together very well, so it is better to do them on a pan or an indoor grill pan)

For Buns:

Slice French Bread into bun-size pieces. 

Place onto a pan and brush with olive oil or butter

Sprinkle garlic powder onto bread

Broil in oven until browned- watch carefully!


Serve and Enjoy!

Monday, February 28, 2011

Homemade Honey Wheat Rolls

I was so proud of myself on Friday- I made my first homemade bread.  Well, rolls, but that counts as bread, right?  I used yeast and everything!  (the thought of using yeast is scary to me for some reason, it really wasn’t bad at all- go figure)

100_0946

I used this recipe.  I thought they turned out good, but were a little dense.  It’s a long recipe, so if you’re interested just go there, she does a good job of explaining it :)

Friday, January 14, 2011

Homemade Wheat Thins


Ingedients
1 ¼ cups whole wheat flour
1 ½ Tbs sugar (or honey)
½ tsp salt
¼ tsp paprika
4 Tbs butter
¼ cup water
¼ tsp vanilla
salt for topping

Preheat oven to 400 degrees and lightly grease cookie sheets

Directions:
1. Combine all dry ingredients in a large bowl.
2. Cut in butter- a fork works good to do this if you don't have a pastry blender
3. Add vanilla and water and mix together well.  (If you are using honey instead of sugar, mix with the water and then add)
4. Divide dough into 3-4 balls.
5. Flour surface and roll out dough (make sure you roll out as thin as you can)
6. Cut out cracker shapes using a pizza cutter. 
7. Place  the cut crackers on a baking sheet.  (You can crowd these together, they don't expand while baking)
8. Using a fork, poke holes into the crackers. 
9. Bake the crackers for about 10 minutes
10. Let cool to crisp

Enjoy!

Monday, January 3, 2011

Chicken Taco Soup- A Round 2 Recipe


Have you ever watched Sandra Lee's Money Saving Meals on the Food Network?  I like to watch it every now and then and always enjoy her "round 2" receipes where she uses leftovers from her meal to create another meal.  This recipe is inspired by that.  All you have to do is plan to buy a couple of extra ingredients while your grocery shopping and you get two meals from one.

I had fixed chicken fajitas for supper one night last week and had planned to use the leftovers to make chicken taco soup. 

Here's what I included:
1 large can of diced tomatoes (do not drain)
Leftover fajita chicken
Leftover black beans
Leftover white rice
1 can of corn
1 packet of taco seasoning
Sour Cream for topping (if desired)

All you have to do is combine all the ingredients in a large pot and warm!  Quick, easy, and delicious!  It made a good bit of soup when  combined everything- enough for 2 more meals!


I had made some homemade whole wheat tortillas for the fajitas so I made some tortilla chips out them to go with the soup.  I cut up a couple of tortillas, sprayed them with Pam butter spray and sprinkled with salt.  I put them on a pan and stuck them in the oven on broil for about 5 minutes.  Make sure you watch them, they burn quickly!  They are nice and crispy and a great way to get additional use out of your leftovers!

Saturday, December 18, 2010

Homemade Croutons


I just love croutons in my salads, don't you?  I think they are the best part of a salad :)  Today I wanted to share a simple recipe for homemade croutons.  This will save you money from buying pre-packaged croutons and I think they taste better!

Homemade Croutons
You will need:
Bread (Loaf bread, Italian bread, etc.  Any bread should work)
Olive Oil
Mrs. Dash Table Seasoning

I found a great buy on some artisan garlic bread at Kroger on my last shopping trip.  It was originally $3.29 and I got it on manager's special for .89! I am making spaghetti this week so we will have garlic bread with that, but I had plenty and decided to make some croutons. 


1. First, preheat oven to 350 degrees

2. Cut bread into cubes.  I would suggest using a serrated knife- it works better cutting bread.  Trust me, I tried the other first :) You can cut these however you like best, big or small.

3. Place bread cubes onto a baking sheet and drizzle with olive oil. 

4. Sprinkle with Mrs. Dash Table Seasoning


5. Bake for 10 minutes and then flip

6. Bake an additional 10 minutes- watch them closely so they don't burn!

7. Let cool and then serve or store!

Wednesday, December 15, 2010

Homemade Whole Wheat Tortillas

Tuesday morning I went out on a limb and decided to attempt making some homemade whole wheat tortillas.  I'm so glad I did! 

As I've said before, Jeremy and I really want to eat healthy and live healthy lifestyles, and we part of that is cutting out as much processed foods.  I decided that instead of buying loaves of bread full of high fructose corn syrup I would attempt making our own bread and tortillas.  I've not got to the bread yet, but I'm fairly pleased with the tortillas.  They are quick and easy and taste great!

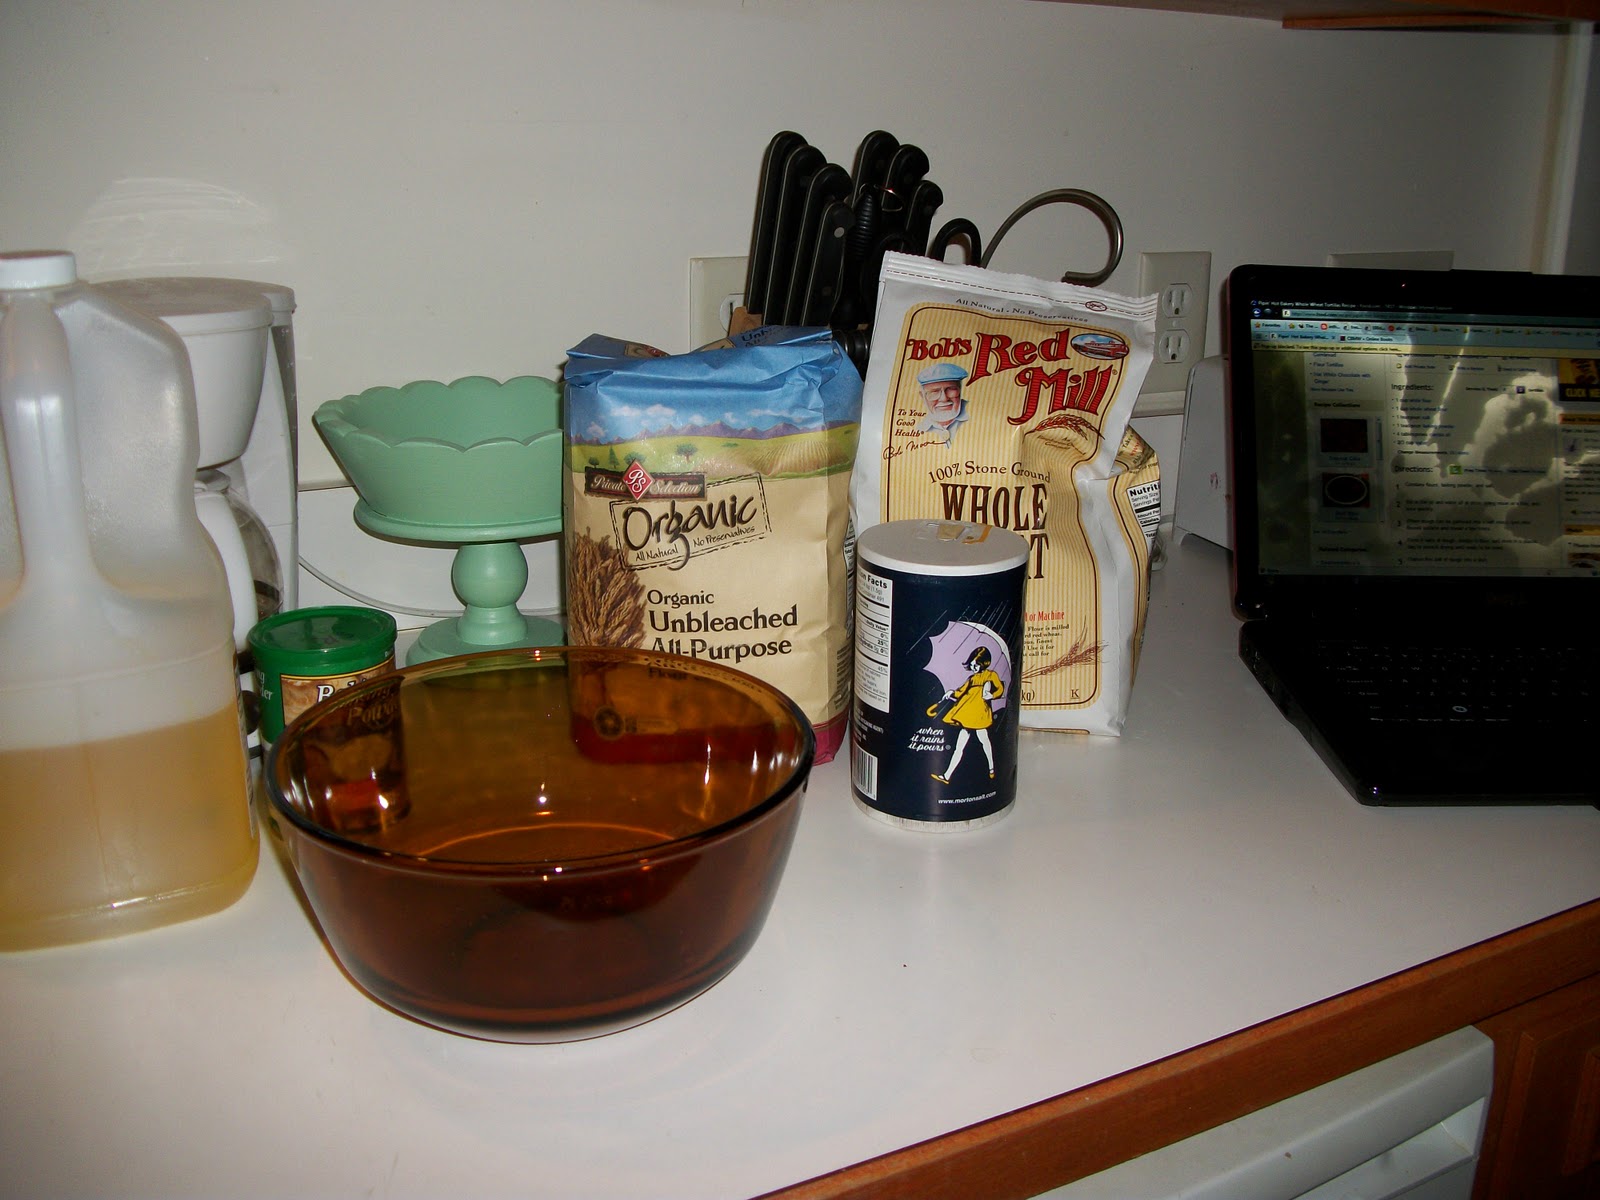
Here is what you need:
1 Cup of White Flour (I used unbleached organic white flour)
1 Cup of Whole Grain Flour
1 tsp salt
1 tsp baking powder
4 tbsp canola oil (I used vegetable oil)
2/3 cup of water (I used hot water)


Directions:
Combine flours, salt, and baking powder in a large bowl

Add oil and water and mix together until dough forms


Flour flat surface and knead dough

Form dough into 7-8 balls (You can dredge these and flour and save them for later in the fridge if you want)


Roll balls out thin, flipping between turns


Place tortilla in an ungreased pan on medium high heat.  Cook on each side about 40 seconds. First side should be pale and sprinkled with brown spots and the other side will be blotched.


Continue with other balls until finished.  Stack together to keep warm. 

Serve and enjoy!


I used one for a sandwich wrap for my lunch and plan to make tacos for Jeremy tonight!

I need to learn to make them a little thinner (maybe a real rolling pin would help, I used a glass cup), and make them into circles. 

Recipe modified from here.

Sunday, November 21, 2010

Easy Homemade Biscuits

A lady from back home shared an easy way to make homemade biscuits with my dad a couple of years ago and I love it!  They are super easy and delicious! 

You only need two ingredients:
Heavy Whipping Cream
Self Rising Flour

Directions:
Just put some flour in a bowl and pour some heavy whipping cream. I don't have exact measurements, just add some of each until its a dough consistency.  Roll out and cut biscuits.  Put a little butter on top of each biscuit.  Bake at 400 for about 15 minutes. 

Enjoy!

I made these tonight to send with Jeremy on his trip home for Thanksgiving.  He has a 12 hour ride tomorrow so I wanted to send him off with something to munch on. :)

Sunday, November 14, 2010

Chocolate Chip Cookies

Last night Jeremy and I were hanging out and I wanted to make a dessert from scratch and decided to make chocolate chip cookies.  I have attempted making chocolate chip cookies probably 2-3 times off of the Toll House chocolate chip package put they have always turned out really really runny and ended up just being one big cookie sheet because they all ran together while cooking.  Aliesha on her blog, Feathers in Our Nest, posted a recipe for chocolate chip cookies a while back and I decided to try out her recipe.  We loved them!  I've written this one down and put in my recipe box and its going to be my go to Chocolate Chip Cookie recipe.  If you'd like the recipe, visit her here.

I love that you don't have to use all the cookie dough at once and just put the leftovers in the fridge.  I'm going to just put a few more in the oven this morning for the kids snack at church.  I may freeze the rest.

Tuesday, November 9, 2010

Spicy Garlic Lime Chicken

recipe image


I made this chicken the other night and thought it was fantastic.  I modified the recipe from here.  I didn't have all those ingredients so I just tweaked it to what I had. 

*Note: I only used 2 frozen chicken breast (the kind that come in a bag at Wal-Mart) instead of the 4 suggested, I would add additional spices if you do more chicken breast.  I did cut up my 2 chicken breast into 4 thinner pieces so they would cook faster, but I would still add some more spices if you were making more chicken than 2 big pieces. 

Ingredients:
3/4 teaspoon salt
1/2 teaspoon black pepper
1/8 teaspoon paprika
1/4 teaspoon garlic powder
1/8 teaspoon onion powder
1/2 teaspoon dried parsley
1/4 teaspoon dried parsley

4 boneless, skinless chicken breast halves

2 tablespoons butter
1 tablespoon olive oil
1 fresh lime
Directions:
In a bowl mix together the spices and then rub over chicken breast. 
Heat butter and olive oil in a large frying pan over medium heat
Saute chicken until golden brown and cooked all the way through
Cut fresh lime in half and squeeze juice over chicken breast (You could zest the lime over it too but I don't have a zester)
Let simmer in juice for a few minutes before serving. 

This chicken has a little kick to it and would be fantastic served with rice or chips and salsa.  Kind of reminds me of fiesta lime chicken at Applebee's if it had cheese on top....maybe next time :)

Saturday, October 30, 2010

Delicious Pumpkin Muffins


I have made these muffins twice in the last week- once for my table at Bible study on Tuesdays and once for mine and Jeremy's pumpkin day.  Jeremy usually hates muffins because he hates all things with a dry texture, but these muffins are super moist and he loves them!  They are definitely on the "keeper" list of recipes.  Here is the recipe:

Moist Pumpkin Spice Muffins
Ingredients:
  • 1 Cup all-purpose flour
  • 1/2 c. sugar
  • 2 tsp baking powder
  • 1 1/2 tsp. cinnamon
  • 1/4 tsp ground ginger
  • 1/2 tsp. nutmeg
  • 1.2 tsp. salt
  • 4 tbsp. butter, cut into pieces
  • 1 heaping cup of pumpkin puree
  • 1/2 c. evaporated milk
  • 1 whole egg
  • 1 1/2 tsp. vanilla
Topping:
  • 2 tbsp sugar
  • 1 tsp cinnamon
Preparation:
  • Preheat oven to 400 degrees and grease 12 muffin tins or add muffin liners
  • Sift flour, sugar, baking powder, cinnamon, ginger, nutmeg, and salt.
  • Cut in butter with a pastry blender until it fully incorporated (or a fork, or I used a blade of a blender)
  • In a separate bowl, mix together pumpkin, evaporated milk, egg, and vanilla. 
  • Pour pumpkin mixture into the flour mixture.  Fold gently until mixture is combined.
  • Pour into greased muffin pan- fill about 1/2 full
  • Sprinkle with topping mixture
  • Bake for 25 minutes
  • Allow to cool for15 min in pan, and then remove to cool. 
  • Optional: Ice with a cream cheese icing
Enjoy!
Related Posts Plugin for WordPress, Blogger...